User Manual Scheduling
- Dashboard
- Customers
- Providers
- Scheduling
- Accounting
- Post Operations
- Organization

Search and View Bookings
This section provides detailed instructions on how to search, display, filter, and sort appointments. It includes guidelines for toggling between list and calendar views, managing visibility, and understanding booking statuses based on your specific business rules.
Summary of search and display guidelines
- Search Capabilities:
- Users can search by customer name or Booking ID.
- Time Zone Display:
- Each appointment displays the time zone for visibility into appointments across different regions.
- Default Sorting and Filtering:
- The system defaults to show current and future bookings in ascending date order.
- Completed bookings are excluded from the initial view.
- Status-based Display:
- Color-coded statuses improve visibility and reduce errors.
- Other statuses (completed, cancelled and No Show) are displayed with distinct colours to enhance clarity.
- Visibility Based on Organization:
- Sub-organizations: Can view only their own bookings and cannot see bookings of other sub-organizations under the same parent organization.
- Parent Organization Users: Have access to bookings across the entire organization and sub-organizations.
- Providers and Operators: Can view availability of their own providers to match with bookings.
How View and Navigate the List of Appointments?
Upon landing on the scheduling page, you will see the list of current appointments for the organizations. The system loads the first set of records to minimize wait time. You can click Load More to view additional records.
Access the Appointment List: Navigate to your appointment scheduling system.
- Left Navigation - Scheduling

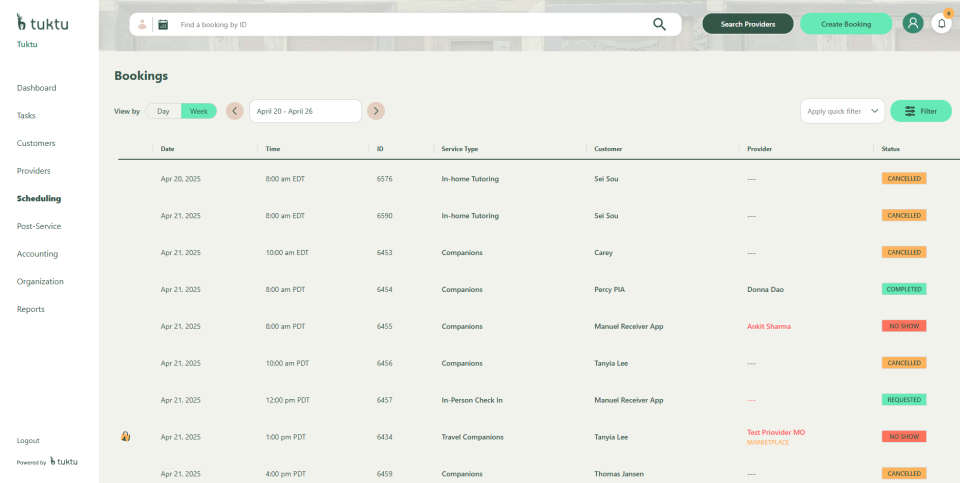
How To Search for Appointments
Search by Customer Name:
- On the scheduling landing page, use the search bar to enter the customer's name.
- Results will display appointments matching the entered name.

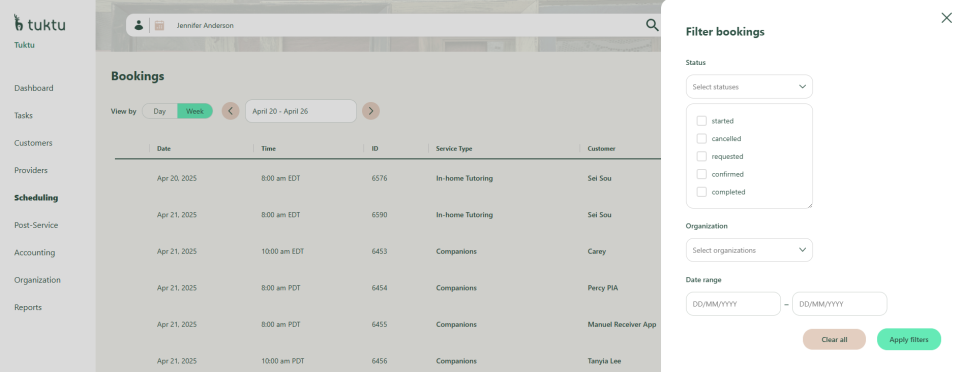
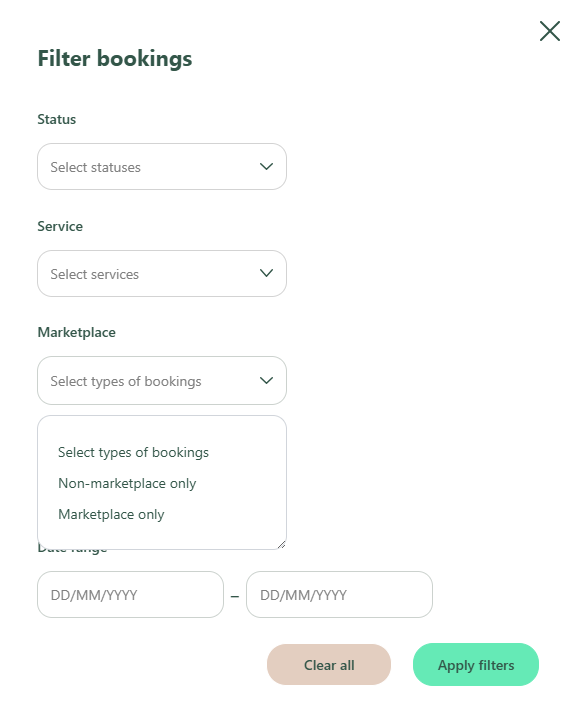
Filter by Date and Status:
- Use the date filter to select a specific period or range.
- Use the status filter to narrow down results by:
- Requested
- Cancelled
- Confirmed
- Started
- Completed
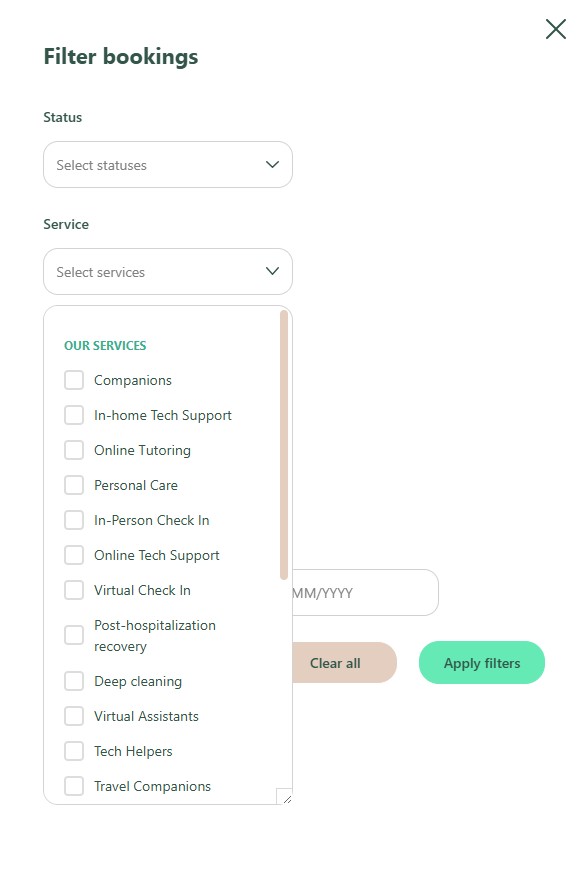
Filter by Services: Select the service type to view bookings associated with that service.
Search within Marketplace: Filter the booking based on Non-marketplace only or Marketplace only
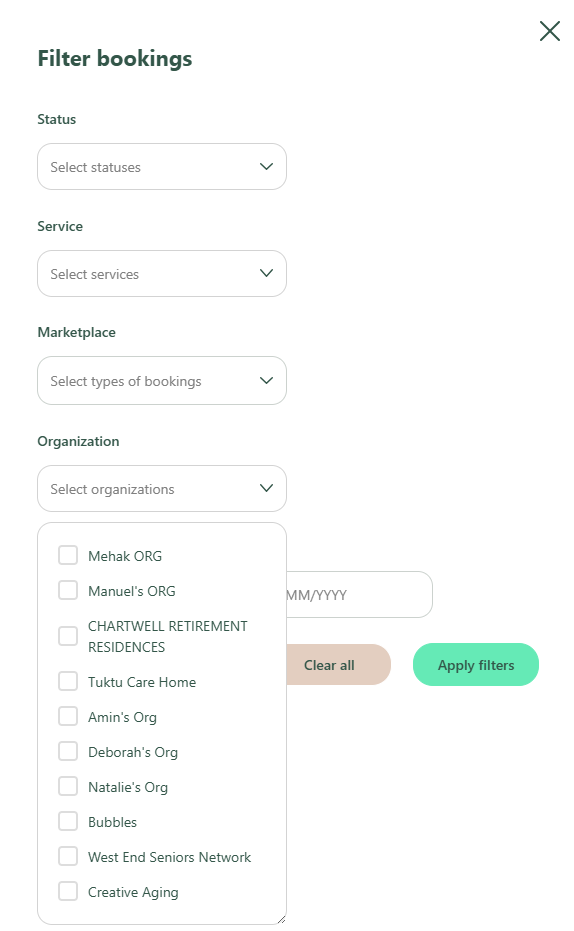
Search within Sub-Organizations:
- Sub-organizations can only view bookings assigned to their organization.
- Operators can see the availability of their organization's providers.
- Parent organization users can view bookings across the entire organization, including sub-organizations.
How to See Appointment Details
Use this option if you need to review details for all occurrences within a recurring series.
Navigate to the List View: On the scheduling landing page, locate the appointment from the list view.

Select an Appointment to see its details
- From the list view, click on the specific appointment you want to view.
- You will see a slide-out from the right to show the detailed view of the appointment.
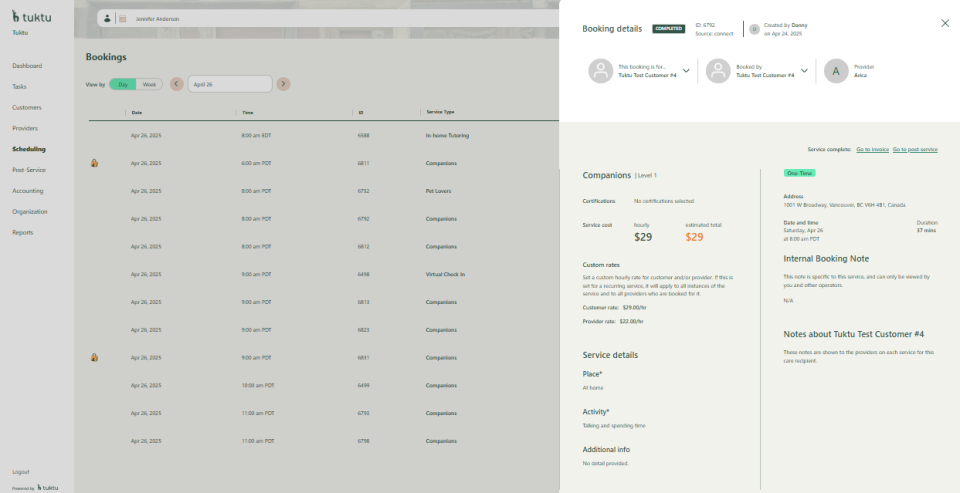
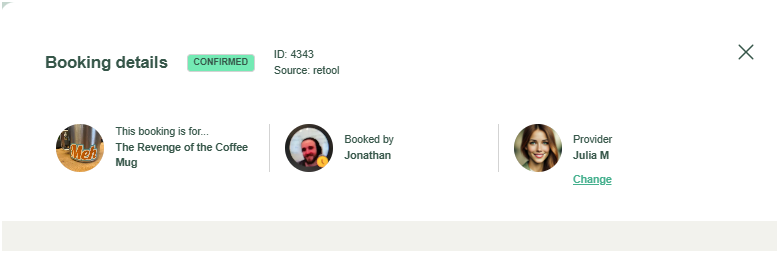
Explore Appointment Details: The detailed view will display all booking information, including:
- Appointment date, time, and time zone
- Service type and provider details
- Customer information and service location
- Appointment status (e.g., cancelled, completed)
- Instructions or additional notes from the provider or operator
Take Actions from the Detailed View:
Edit the Appointment:
- Update relevant fields, such as date, time, or service type.
- Save the changes to apply the updates.
Cancel the Appointment:
- If the appointment needs to be canceled, click Cancel Appointment and confirm the action.
- A cancellation notification will be sent to the customer and provider, if applicable.
View Instructions or Special Notes: Check for any special instructions or notes relevant to the booking, such as preparation steps or reminders.

To get back to the appointment list view, close out the slide out by click on the X button on the top right of the slide-out pane